
Mother’s Day is coming up and creating a handmade card for your Mom certainly shows her how much you care. Here are 4 easy to follow tutorials to create your own DIY Mother’s Day greeting card.

Affiliate links used on items below. See disclosure here.
If you are a visual learner, view the process video here or below.
Modern Felt Flowers for Mom
I cut out some felt flowers using this die set. Then I stuck them on my card front to create my own textured patterned paper. I went back into fill in dots with this marker. Then I cut out the word “mom” using this alphabet die set and attached it across the front.

Supplies:
Wool Felt
Metal Dies
Manual Die Cutting Machine
Glue
Alphabet Die Set
Opaque Marker
Heat Embossing and Coloring
I heat embossed the stamp set on cardstock and then the bowl on vellum. Then I colored in the flowers using these markers. I colored the back of the vellum using these markers. Then I adhered the bowl to the stamp set. I then used this marker to hand letter the word “mom”. I attached it to a grey cardstock base and added these gems.

Supplies:
Flower Stamp Set
Embossing Powder
Vellum
Heat Gun
Versamark Ink
Markers to color flowers
Markers to color bowl
Handlettering Pen
Gems
RELATED: 30 Inspiring Mother’s Day Quotes
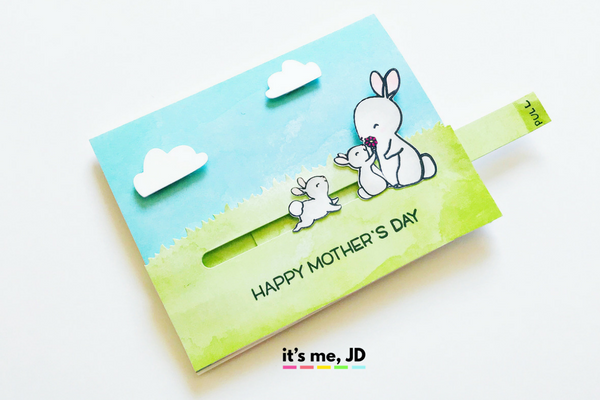
Slider Pull Tab
I pulled out some watercolor cardstock for my background and used this metal die set to create the grass and clouds. I pulled some colored images from my stockpile storage to create the slider. I used foam tape to attach the small bunnies to the pull tab. The back of the slider was covered in this foam tape and adhered to my card base. I then stamped “Happy Mother’s Day” using this stamp set.

Supplies:
Scene Builder Die Set
Watercolor Cardstock
Bunny Stamp Set
Markers to Color Bunnies
Slider Die Set
Foam Tape
Sentiment Stamp Set
Ink Blended Shaker Card
I started by ink blending these inks in a circle on my cardstock. Then I spritzed this shimmer spray on there and blotted the excess. I cut out a rectangular frame and stamp a sentiment from this stamp set to create my own patterned paper. I heat embossed the word “mom” from the same stamp set onto this special heat resistant acetate. Then I attached the acetate to my frame. I then filled my shaker bits on the my ink blended background. I put foam tape on the back of my frame and then attached that to my background.

Supplies:
Inks
Ink Blending Tool
MISTI Stamping Tool
Mom and Dad Stamp Set
Embossing Powder
Versamark Ink
Heat Gun
Shimmer Spritz
Sequins
Foam Tape
Acetate
Anti-Static Powder Tool
See Process video here or below.
