
You love to craft, you love to create, now you’ve decided to share your passion for creativity with the world. Starting a craft blog is fun, exciting, and easier than you think.
Once you are sure you want to start a DIY and Craft blog, and you have chosen a name for your blog as well as a platform, it’s now time to set it up.

If you followed my recommendation for wordpress.org with Bluehost for hosting and domain (yay!), then these are the next steps to set up your blog. Seriously, you can’t beat a couple of dollars a month, and free domain registration for a year on Bluehost.
Setting up your DIY and craft blog on wordpress.org can be scary, especially for the technology challenged. But don’t you worry, I’ve put together this tutorial so you can set it up in a few easy steps.
You’ve got your domain name chosen right? Credit card, ready? Ok, let’s go!
1) Bluehost Set-up
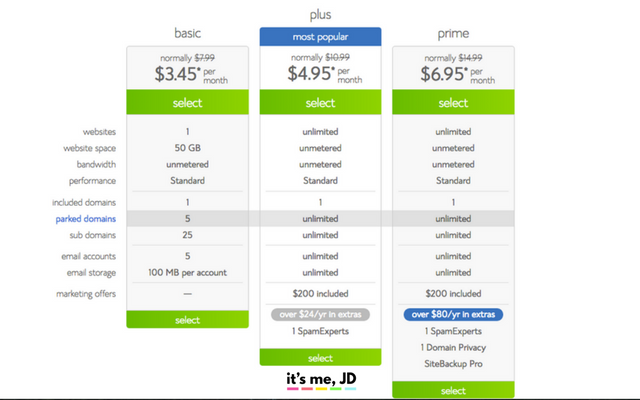
On bluehost.com, hit “get started”. You’re going to choose a hosting plan. Hosting is like renting a space on the web for your website to “live in”. Depending on your budget, I recommend getting the starter pack or the most popular. Bluehost offers a 30 day money back guarantee even if blogging doesn’t work out. Go ahead and select your Package.
Enter in your domain name. Your domain name is your website URL. For example, my domain name is https://www.itsmejd.com
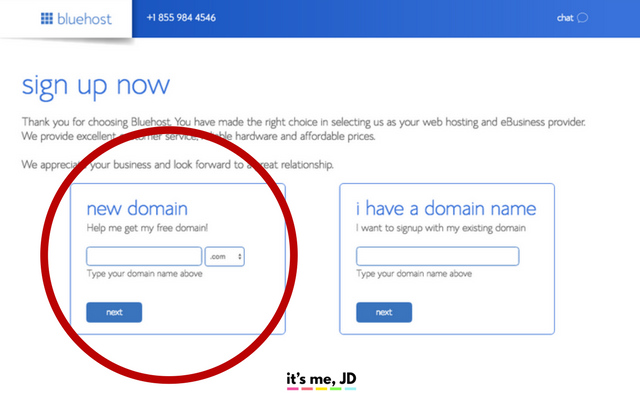
Once you have verified that it’s not taken, it’s time to choose your package. Pay close attention here. You can either choose a 12 month, 24 month, or 36 month. The longer your package, the cheaper per month it is. When I bought the package, I think I went with the 24 month. The only “extra” I recommend getting is the “whois” or the domain privacy package. That will keep your details private.
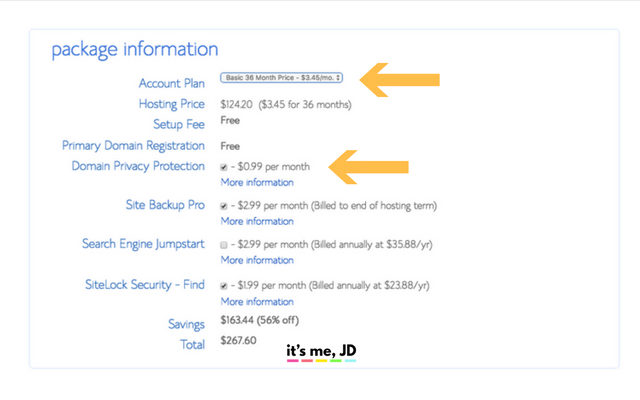
Hit purchase, and you will receive some confirmation emails
2) WordPress Set-up
Now it’s time to create a username and password, and go to your Bluehost account and then login to your Cpanel. It should be in the toolbar across the top. You don’t really need Bluehost to install wordpress for you. You can do it yourself and save the money. Again, navigate to your CPanel, scroll down until you see the icon that says “Install WordPress”

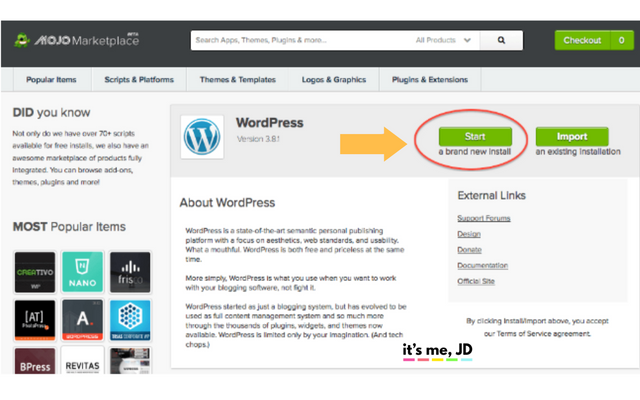
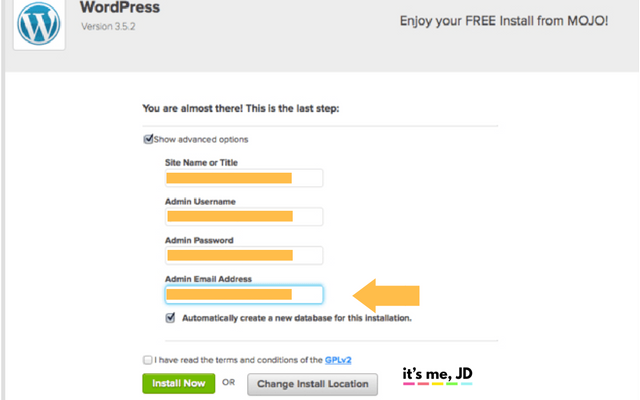
Fill out the options using a complex username (not “admin”) and a complex password (not “password”)
Hit “Install” and then you’re done!
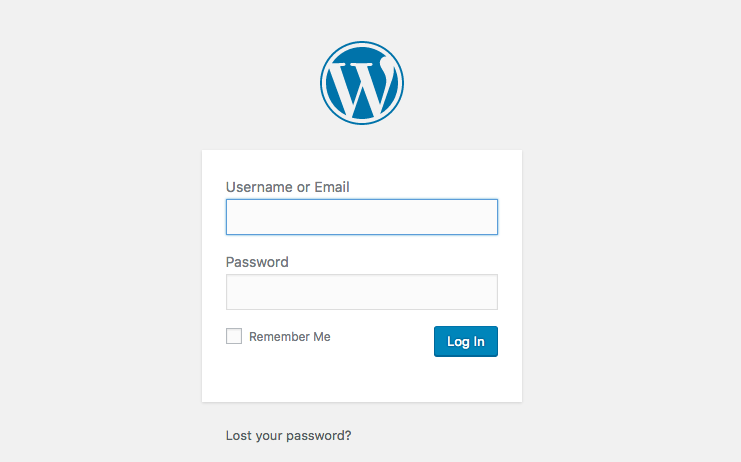
The system will start installing for you. Once it’s done, log into your website.
Do this by going to www.(yoursitename).com/wp-admin with the login credentials you created (the complex ones, remember?) For example, http://www.google.com/wp-admin, http://www.mycraftythings.com/wp-admin, etc.
Start dreaming up some content because you’re almost there…
3) Theme set-up
If you got content ready to upload, great! However, you can’t quite make your site public yet, you have to make it your own! By this, I mean installing a theme to customize your website. On you wordpress dashboard, go to “Appearance” then “Theme”
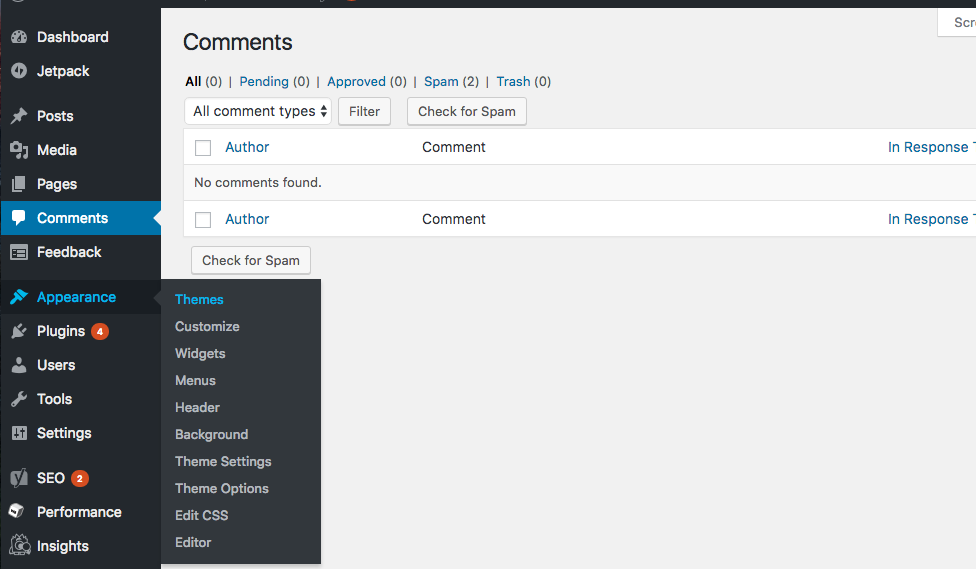
Think of a theme as the “look” of your website, “the outfit” if you will. You can add logos, headers, change colors, fonts, etc. You can start with the free ones from wordpress. HOWEVER, if you really want to make your blog SHINE then I recommend getting some premium themes. Below are the sites I love getting themes from (and have used them in the past, so I can definitely recommend). Wherever you purchase from, make sure they they have a support or help desk just in case you run into trouble.
- Bluchic (This blog is fabulously decorated with the Marilyn theme from Bluchic, I find that Bluchic Themes are the most user friendly for the non-techy.)
- Pretty Darn Cute Design (as the title says, Pretty Darn Cute Design! and awesome customer service)
- StudioPress Themes for WordPress (lots of options here, keep in mind you need Genesis Framework)
- Restored 316 (Feminine Themes and needs the Genesis Framework)
There you have it… so, what’s your first blog post going to be?
RELATED:
10 Things to Know Before You Start Your DIY and Craft Blog
The Best Names for Your DIY and Craft Blog
How to Start a DIY and Craft Blog
